

What Does Simulator Installation Include for Golf?

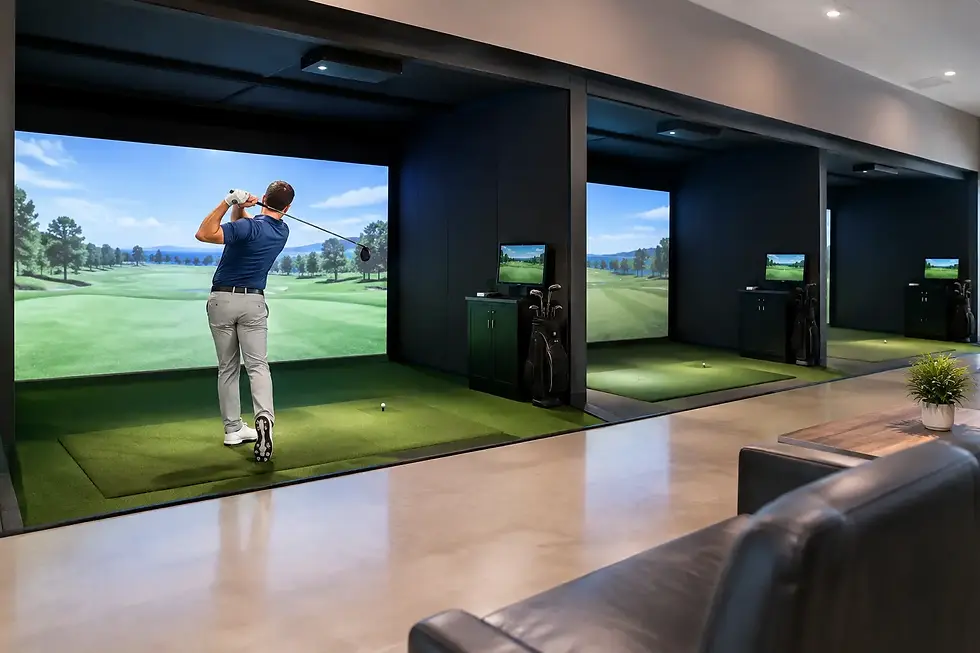
A golf simulator is not just a launch monitor, projector, and impact screen in the same room. The difference between a setup that looks good on paper and one that delivers dependable, accurate play comes down to the work around the equipment. So, what does simulator installation include? For a professionally planned build, it includes the design decisions, technical setup, finishing work, testing, and support required to make the entire room work as one system.
For a homeowner, that may mean turning an underused basement or garage into a year-round practice and entertainment space. For a bar, golf course, school, or simulator venue, it means building a durable customer-facing experience that can stand up to frequent use. The exact scope depends on the room, technology, budget, and whether construction work is needed, but the goal remains the same: a simulator that is ready to play, not a collection of boxes waiting for answers.
What Does Golf Simulator Installation Include?
A complete installation starts well before equipment arrives. The installer needs to understand the room's clear dimensions, ceiling height, flooring, lighting, electrical access, network needs, and intended use. A space built for a right-handed golfer practicing a few nights a week has different requirements than a commercial room serving right- and left-handed guests all day.
This early planning is where costly mistakes are avoided. Ceiling height affects the ability to swing freely. Room width influences screen size, hitting position, and whether both right- and left-handed players can use the system without moving equipment. Depth affects projector placement, player safety, and the distance between the ball, screen, and launch monitor.
Professional installation also accounts for the technology being selected. Trackman, Uneekor, Foresight, and ProTeeVX systems do not all mount, track shots, or connect in the same way. The room should be designed around the selected launch monitor rather than forcing the technology into a layout that compromises its performance.
Site Assessment and Custom Room Design
The first practical step is a detailed assessment of the installation site. This can involve reviewing photos, measurements, floor plans, and video of the room, followed by a consultation about how the simulator will be used. A serious golfer may prioritize club and ball data, while a family may want a larger screen and a more polished entertainment room. A commercial operator may need easy-to-clean finishes, commercial-grade components, and efficient player flow.
The design process determines the screen dimensions, enclosure style, hitting area, projector location, launch monitor position, computer placement, and seating or spectator space. It also identifies potential obstacles such as soffits, ductwork, low-hanging lights, support posts, uneven floors, or doors that affect the available swing area.
A good design protects both performance and appearance. It considers sightlines, minimizes distracting light, keeps cables out of view, and creates enough clearance for players to swing confidently. It also makes room for future service access. A clean finished room should not make it difficult to reach a projector, computer, or power connection later.
Equipment Delivery, Placement, and Assembly
Once the design is finalized, installation includes receiving and organizing the simulator components. Depending on the project, that may include the launch monitor, impact screen, enclosure, projector, hitting mat, turf, computer, software, display hardware, speakers, and accessories.
The enclosure and impact screen are assembled and tensioned properly to create a flat, durable hitting surface. This matters more than many buyers expect. A poorly tensioned screen can sag, create excessive bounce-back, look uneven under projection, and reduce the polished feel of the space.
The hitting mat and turf are then positioned so the ball sits at the correct relationship to the screen and launch monitor. For some systems, precise alignment is essential for accurate ball tracking. Premium turf can also be integrated across the floor to create a finished look and provide a comfortable surface for players and guests.
Projector selection and mounting are equally important. The projector must be bright enough for the room and sized correctly for the screen. It must also be mounted where golfers will not cast shadows onto the image or risk contact during a swing. Short-throw projector placement, image size, lens adjustments, and screen alignment all need to be handled carefully for a sharp, square image.
The Technical Work Behind Simulator Installation
The best simulator experience depends on more than physical assembly. It needs reliable power, computing, software, display settings, and network connectivity. This is where a golf-focused installer with real IT expertise can save a buyer considerable frustration.
The installation team connects and configures the simulator computer, launch monitor, projector, and any additional displays. They install the necessary software, apply updates, set resolution and graphics settings, and confirm that the system recognizes the connected hardware. If the room includes a television, audio system, touchscreen, or multiple displays, those components must be integrated so they work together without creating a cluttered user experience.
Cable management is part of this technical scope. Power, HDMI, USB, Ethernet, and audio cables should be routed safely and discreetly wherever possible. In a commercial environment, exposed cables are not only unattractive. They can become a maintenance issue or a trip hazard. In a home, clean cable routing makes the simulator feel like a finished room rather than a temporary setup.
Network planning is another variable. Some software features, course updates, online play, and remote support require stable internet access. A hardwired connection is often preferable when it is practical, especially for commercial installations or rooms far from the main wireless router. That said, a strong Wi-Fi network may be sufficient in some homes. The right approach depends on the room and the system's intended use.
Calibration, Testing, and Player Setup
After the equipment is installed, the system needs to be calibrated and tested. The launch monitor is aligned according to manufacturer requirements, the hitting location is confirmed, and the projector image is adjusted to the screen. The installer should verify that shots are reading correctly and that the display responds as expected.
Testing should reflect real use, not just a quick power-on. That means hitting shots with different clubs, checking the visual image from the player's perspective, confirming that the projector stays clear of the swing path, and making sure the computer, software, and peripherals communicate reliably.
The final player setup can include software orientation and a walkthrough of basic operation. Owners should understand how to start the system, select a practice mode or course, create player profiles, shut down equipment correctly, and handle common issues such as a disconnected device or an available software update. Commercial clients may also need guidance on daily opening and closing procedures, guest use, and basic upkeep.
What May Not Be Included in Every Installation
Simulator installation is customizable, so not every project includes every construction or finishing service. It is wise to clarify the scope before purchasing equipment or scheduling work. Electrical upgrades, dedicated circuits, drywall, framing, HVAC changes, painting, flooring, permits, and major demolition may be handled by the simulator provider, a general contractor, or separate licensed trades depending on the project and local requirements.
For example, a finished basement with adequate power and a suitable ceiling may need only simulator-specific installation and light finishing work. A garage conversion or new commercial facility could require more extensive preparation before the screen, turf, and technology can be installed.
The same is true for add-ons. Lounge seating, custom cabinetry, wall padding, acoustic treatments, signage, putting areas, and food-and-beverage integration can elevate the space, but they are not automatically part of a standard package. These elements should be selected because they serve the way the room will actually be used, not because they look impressive in a rendering.
Why a Turnkey Approach Matters
Buying components separately can appear less expensive at first. However, it shifts the responsibility for room planning, compatibility, installation, calibration, and troubleshooting to the buyer. A projector may not fit the room. A mat may not align with the launch monitor. A computer may not meet the software requirements. The issues are usually fixable, but they can delay the project and add unplanned cost.
A full-service partner coordinates the decisions before those problems reach the room. Green Pro Golf Simulators helps clients match premium equipment and installation details to their space, priorities, and budget without treating every project like the same package. That is especially valuable when a home has unusual dimensions or a business needs a simulator that performs consistently for every guest.
The right installation should feel simple once it is complete. You walk in, power up, place a ball, and focus on the next shot. Whether the room is built for winter practice, family competition, customer traffic, or golf instruction, the quality of the installation is what turns premium equipment into a space people will want to use again and again.


Comments